Download the installation file to somewhere you can find on your hard drive.
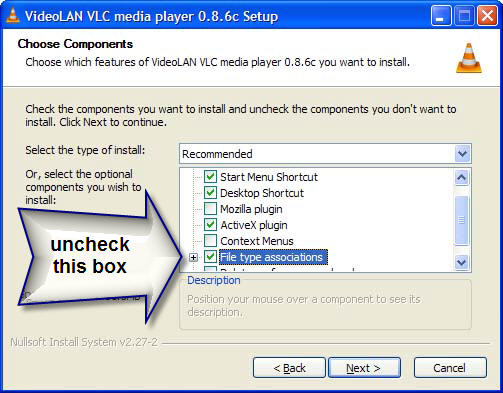
While installing, take care during the "Choose Components" part of the installation. Its default is to take over displaying all of your sound and video files, which you probably do not want. So, when the Choose Components dialog box appears during the installation, scroll down to File Type Associations and uncheck it (see below).
Double-clicking the file you downloaded will start the VLC installation process.
For Mac OS X:
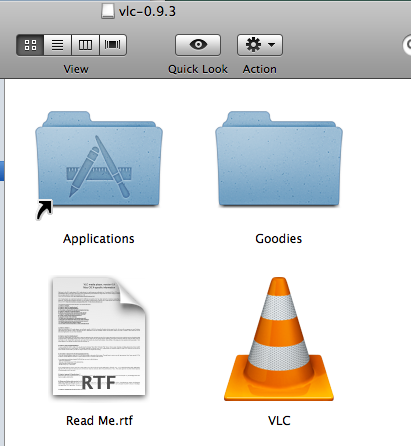
VLC for Mac OS X is distributed as disk image (a "dmg" file).
Download the disk image (.dmg file), double-click it to open it in a Finder window (below).
Then drag the VLC media player icon to your Applications folder.
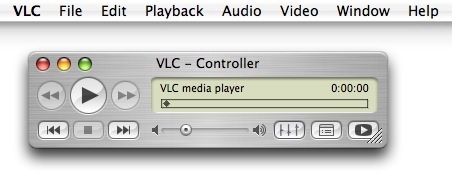
Run VLC by double-clicking on it in the Applications folder.
Set VLC's Preferences for Frame Grabbing (i.e., Snapshots)
Before you grab your first frame, it's a good idea to set some basic preferences so that your frames will be of most use.
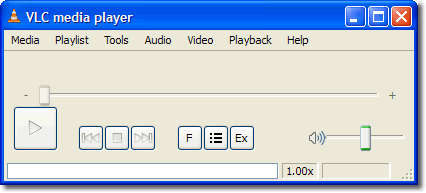
Start VLC. (Hint for Windows users: It'll be under VideoLAN in your start menu. Or use the icon on your desktop.) It'll look something like this:
This short QuickTime video takes you through the configuration steps, which are also described immediately below. (Your version of VLC might look slightly different from this one.)
Go to the Tools menu and choose Preferences. (Mac: Go to the VLC menu and choose Preferences.)
Click Video (if it's not already selected)...
...to pull up the General Video Settings
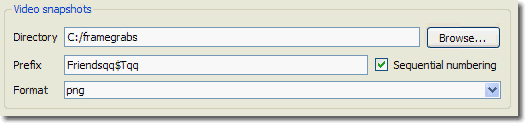
Under the Video snapshot category set the following items:
Directory (aka folder):
Click the Browse button to locate a directory/folder on your hard disk where you'd like to store your frame grabs. (You can also create a new directory/folder at this point.) In the movie above, I set the directory to C:\framegrabs.
Sequential numbers:
By default, VLC adds a number to the file name that is based on what time it is when you grab the frame. This is not very helpful in most situations. You can choose instead to have VLC count your frame grabs and number the files that way: e.g., 0001, 0002, 0003, and so on. To do so, check this box.
Prefix:
By default, all of the files you capture will begin with the letters, "vlcsnap-." Change this to the name of the TV show/film from which you're grabbing frames. For example, "Friends."
Optional configuration for Shot Logger:
The following adjustments are only required if you are submitting frames to Shot Logger. However, they will make it easier to use your frames for analysis even if they are not creatd with Shot Logger in mind.
Add $T to the prefix. Note: $T must be capitalized. Wherever $T is placed, the timecode will appear in the file name.
Bracket the $T timecode variable with "qq" (no quotation marks) so that it will stand out in the filename. That is, put "qq" on both sides of $T.
Putting this all together, the snapshot file prefix for frames taken from Friends might look like this: Friendsqq$Tqq.
Format:
The default format is PNG, which is okay; but most users prefer to have JPEG images. They're smaller than PNG images and compatible with more applications -- such as Word. On the other hand, PNG images are higher quality.
If you wish to change to JPEG, click the drop-down menu and choose jpg. HOWEVER! Some versions of VLC crash while saving JPEGs. If you have this problem, stick with PNGs and convert them to JPEGs later.
When you're finished, the Snapshot category should look something like this:
Click Save to save your settings.
Important: Close VLC and then re-open it before you open a DVD! Otherwise your settings might not register.
View a DVD
Unless you let VLC take over all your video needs during the installation, when you insert a DVD your computer will probably start playing it with some other piece of software. Stop that playback and then start VLC.
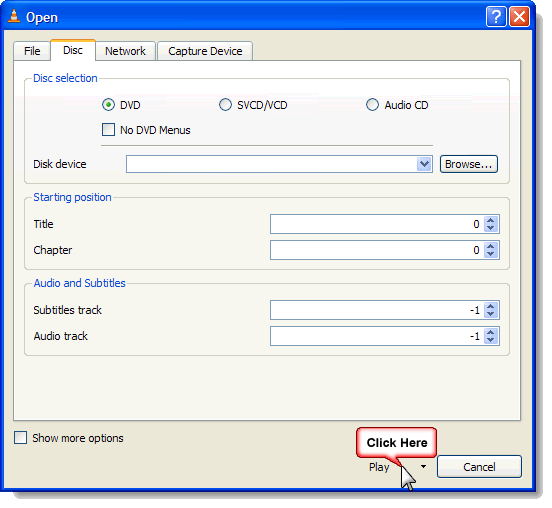
From the Media menu (On Mac: use the File menu), choose Open Disc, which opens this rather confusing and overly detailed dialog box (the Mac version is similarly unhelpful):
The default settings are usually what you want, so just click Play. Your DVD's menu should soon appear. Click a menu choice to start the video going.
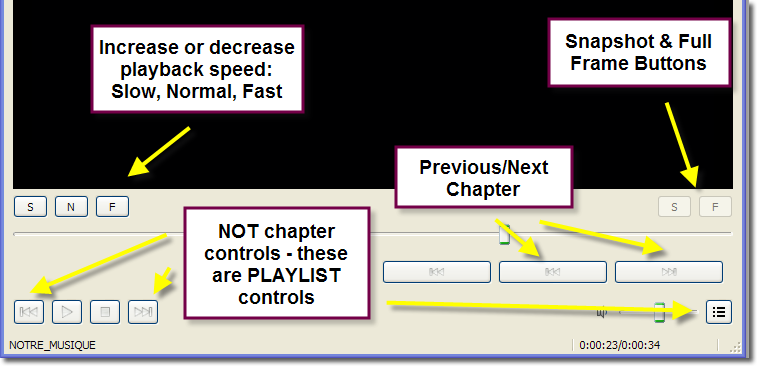
VLC's DVD player should look familiar, but it does have a few peculiarities. The QuickTime movie below takes you through the controls. But please realize that VLC media player is constantly being modified so the current player might not look exactly like this.
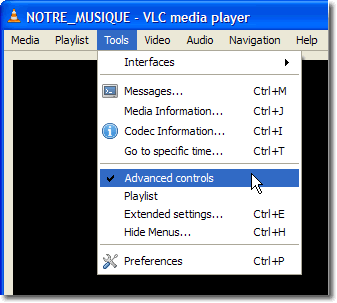
The navigation controls (below) are particularly quirky and might not work they way you expect.. Also, you must go to the Tools menu and select Advanced Controls in order to see the speed controls. (Mac users: If you figure out how to skip to chapters let me know. I've yet to find those controls!)
Grab a Frame (Take a Snapshot)
Presuming you've already set VLC's video preferences (see above), you're now ready to grab frames, or, as VLC put it, take snapshots.
To make the capture, you may either:
Select the Video menu and then Snapshot, or
Press a hotkey on your keyboard--which can be done much quicker while the video plays, and
will enable you to grab frames from the start of every shot:
Windows: CTRL-ALT-S, or, in some versions of VLC, SHIFT-S
Mac: OPTION-COMMAND-S
If you find you use a hotkey a lot, you may want to customize it through the VLC Preferences. Any key that's not already being used may function as the snapshot trigger. Personally, I prefer to use the comma key to take a snapshot.
Either technique will grab a frame and store it on your hard drive, in the location you specified in the preferences. If everything is working correctly, a preview of the captured frame will display momentarily.
In our sample set-up using Friends, we would generate files named:
Friendsqq00_08_37qq00001.png
Take a look at the first file name: Friendsqq00_08_37qq00001.png. Let's dissect this seeming gibberish:
Friends = the show's name, which we set as the VLC snap shot "prefix"
qq = two random letters
00_08_37 = 8 minutes, 37 seconds (that is, the frame's time code -- in this case, it occurs at 8 mins, 37 secs. into the DVD)
00001 = the sequential number that VLC added and will automatically increment each time a grab is taken
.png = the file's format
Shot Logger Requirements
Shot Logger is an online service that facilitates the statistical analysis of television and film.
For Shot Logger to calculate the length of shots, it requires frames taken from the very beginning of every shot in a film or television program. While watching the film or program, press the "video snapshot" hotkey at the start of each shot.
In our sample set-up using Friends, we would generate files named something like:
Friendsqq00_08_37qq00001.png
Friendsqq00_08_50qq00002.png
Friendsqq00_09_00qq00003.png
Friendsqq00_09_31qq00004.png
And so on.
Looking at the time codes in the file names reveals the shot lengths. For example, the first shot is 13 seconds (:08:50 minus :08:37).